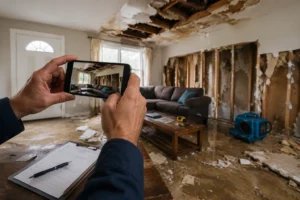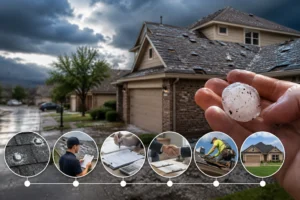
Hailstorms don’t just damage roofs they damage expectations. One moment everything looks fine, and the next you’re staring at dents, cracks, and uncertainty. Here’s the truth most homeowners don’t hear early enough: your payout depends heavily on your hail damage insurance claim documentation, not just the damage itself. Miss a detail, and you could leave thousands on the table.
If you’re preparing for a Hail Damage Roof Insurance Claim, understanding how to properly document every detail can be the difference between a full payout and a frustrating back-and-forth with your insurer. I’ve seen it happen. Solid claims reduced. Legitimate damage questioned. Not because the damage wasn’t real but because it wasn’t documented properly.
Why Proper Documentation Can Make or Break Your Claim
Insurance companies don’t pay based on what you say. They pay based on what you can prove. That distinction changes everything. When an adjuster reviews your claim, they’re looking for evidence that clearly ties damage to a specific storm event. If your documentation is weak, incomplete, or disorganized, your claim becomes easier to reduce or deny.
Here’s where most homeowners go wrong:
- They take a few quick photos and stop there
- They skip documenting non-roof damage
- They fail to establish a clear timeline
- They don’t organize their evidence
Strong documentation tells a story. A weak one raises questions. And in insurance, questions cost money.
Step 1 – Ensure Safety Before Documenting Damage
Before you grab your phone or climb a ladder, pause. Safety comes first. Hailstorms can leave behind more than visible damage. Think loose shingles, slippery surfaces, and hidden structural issues.
Here’s what to watch for:
- Wet or unstable roofing areas
- Broken glass around windows and doors
- Damaged electrical fixtures exposed to moisture
- Debris that could shift underfoot
If your roof looks risky, don’t climb it. Use binoculars, take ground-level photos, or consider a drone. No documentation is worth an injury. None.
Step 2 – Start with a Full Property Overview
This is where many people rush. Don’t. Before zooming in on damage, capture the big picture. You want to establish context what your property looks like as a whole.
Start with:
- Wide shots of your entire home
- Multiple angles of the roofline
- Surrounding structures (garage, fence, shed)
- Yard areas showing hail impact
These photos help prove the scope of the storm’s impact. They also prevent insurers from claiming the damage is isolated or unrelated. Think of this step as your “before the details” foundation.
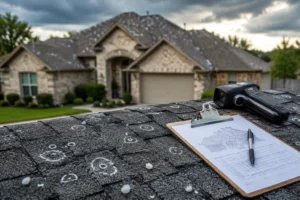
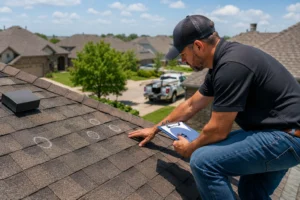
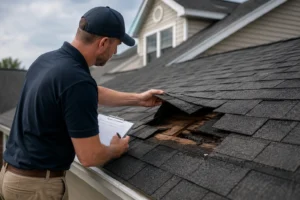
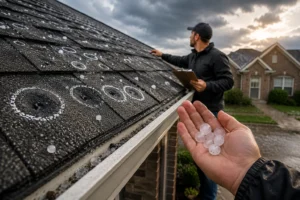
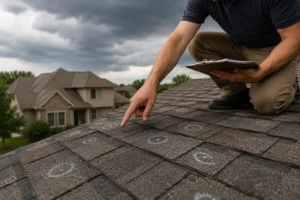
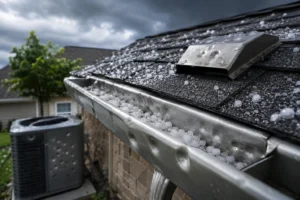
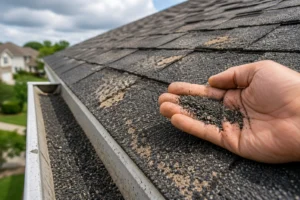
Step 3 – Photograph Roof Damage Like a Professional
Now we get into the core of your hail damage insurance claim documentation the roof. Different materials show damage differently. Knowing what to look for gives you a huge advantage.
What to Capture by Roof Type
Asphalt Shingles
- Dark spots or bruising
- Missing granules
- Circular impact marks
Metal Roofing
- Visible dents or dings
- Paint damage or coating breaks
Tile Roofs
- Cracks or chips
- Dislodged or broken tiles
Best Practices for High-Quality Evidence
- Take photos in natural daylight
- Shoot from multiple angles
- Use a coin or ruler for scale
- Get both close-up and mid-range shots
In more advanced inspections, professionals may even use techniques like Photogrammetry to measure and map damage accurately using images showing just how powerful proper visual documentation can be. A close-up shows detail. A mid-range shot shows location. You need both.
Drone vs. Ladder
- Drone: Safer, great for full coverage
- Ladder: Better for detailed close-ups
Use what’s safe and accessible but don’t skip the roof entirely.
Step 4 – Document All Exterior Damage (Not Just the Roof)
Here’s a costly mistake: focusing only on shingles. Hail hits everything. And insurance claims often expand based on total property damage.
Don’t miss these:
- Gutters & Downspouts: Look for dents and separation
- Siding: Check for cracks, holes, or chipped paint
- Windows & Screens: Tears, breaks, or impact marks
- HVAC Units: One of the most overlooked items hail dents fins easily
- Outdoor Fixtures: Lights, furniture, mailboxes
Every item you document increases your claim’s scope. Every item you miss reduces it. Simple as that.
Step 5 – Check for Interior Signs of Hail Damage

Hail damage doesn’t always stay outside. Sometimes, the real problem shows up days later inside your home.
Look for:
- Water stains on ceilings
- Bubbling paint or drywall
- Damp insulation in the attic
- Musty smells (early mold warning)
Take photos immediately if you notice these. Interior damage helps prove that the roof was compromised. And that’s critical.
Step 6 – Record the Date, Time, and Storm Details
Photos alone aren’t enough. You need a timeline. Insurance companies want to link your damage to a specific storm event. Without that connection, your claim weakens.
Document:
- Date of the storm
- Approximate time
- Duration and severity
You can support this with:
- Weather app screenshots
- Local hail reports
- News coverage
This step transforms your documentation from “possible damage” into “verifiable storm-related damage.”
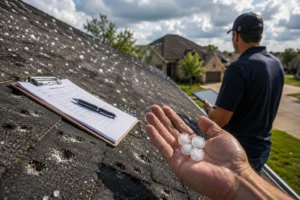
Step 7 – Create a Detailed Damage Inventory List
Photos show damage. Lists explain it. Create a simple but structured inventory of everything affected.
Sample Damage Inventory Table
| Area | Type of Damage | Severity | Notes |
| Roof (front slope) | Shingle bruising | Moderate | Multiple impact points |
| Gutters | Denting | Light | Along entire front edge |
| HVAC Unit | Fin damage | Moderate | Visible dent clusters |
| Fence | Paint chipping | Light | Rear section |
This doesn’t need to be complicated. It just needs to be clear. When your documentation includes both visuals and written details, it becomes harder to dispute.
Step 8 – Keep All Receipts and Temporary Repair Records
After the storm, you may need to act quickly. Tarping a roof. Boarding windows. Preventing further damage. Do it but document everything.
Keep:
- Receipts for materials
- Contractor invoices
- Photos before and after temporary repairs
Important: Avoid permanent repairs until the insurance adjuster inspects the damage. Fixing too soon can weaken your claim.
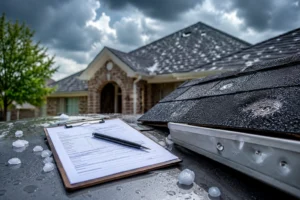
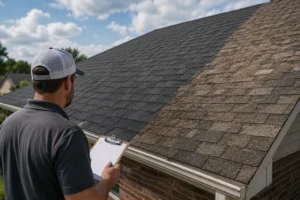
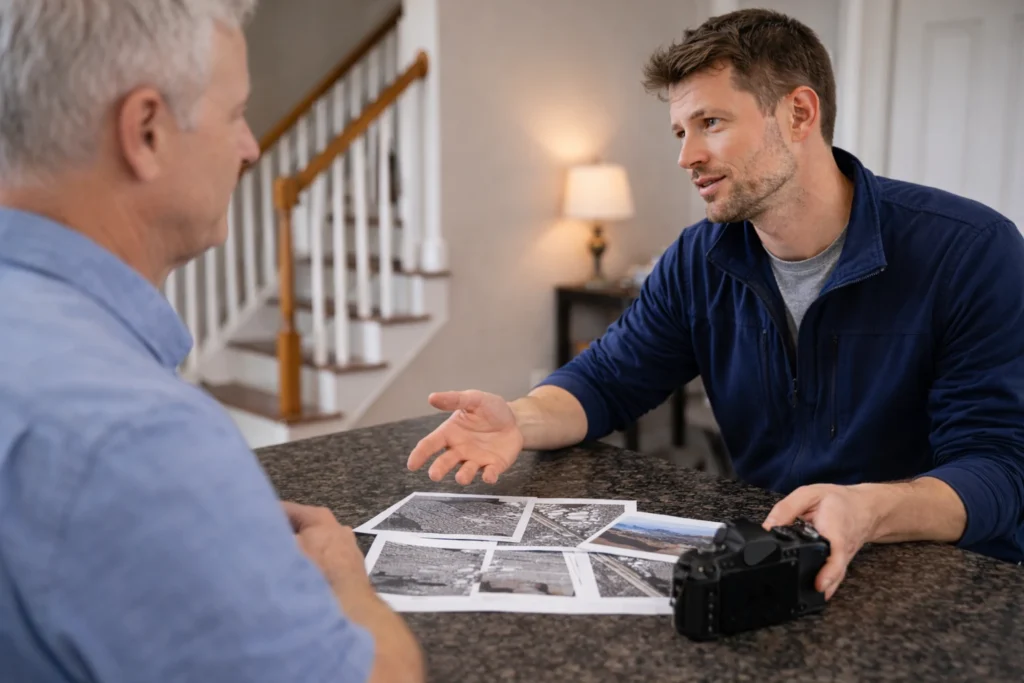
Step 9 – Organize Your Documentation for the Insurance Adjuster
Disorganized documentation slows everything down and weakens your position. You want your claim to be easy to review.
How to Structure Your File
- Photos: Grouped by area (roof, siding, HVAC, etc.)
- Timeline: Storm details and inspection dates
- Inventory List: Clear and labeled
- Receipts: Attached and categorized
Pro Tip
Rename your photo files:
- “Roof_front_damage_1.jpg”
- “HVAC_dent_closeup.jpg”
It sounds small. It’s not. Organization shows professionalism and makes your claim harder to challenge.
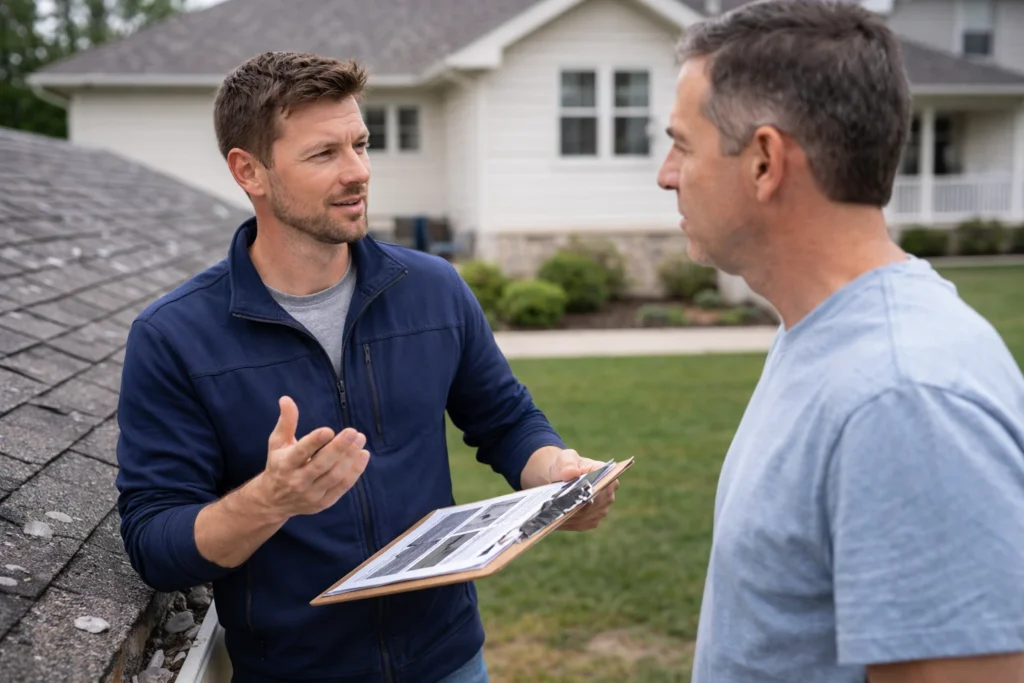
Step 10 – What Insurance Adjusters Look for in Your Evidence
Understanding how adjusters think gives you an edge.
They’re trained to evaluate:
- Pattern consistency (hail vs. random damage)
- Impact direction and distribution
- Functional damage vs. cosmetic issues
This is where many claims fall short. If your hail damage insurance claim documentation doesn’t clearly show functional damage, insurers may label it cosmetic and reduce your payout. Your goal? Remove doubt.
Common Documentation Mistakes That Cost Homeowners Thousands
Let’s be blunt. These mistakes are expensive.
Avoid them.
- Taking too few photos
- Skipping non-roof damage
- Not using scale references
- Waiting too long to document
- Failing to organize evidence
Each one weakens your case. Combined? They can crush it.
When DIY Documentation Isn’t Enough
Sometimes, even solid documentation isn’t enough.
You may need help if:
- The damage is widespread
- Your claim is partially denied
- The payout feels too low
- You’re dealing with a complex property
Contractors can assess damage. But they don’t negotiate claims. That’s a different skill set.
How a Public Adjuster Strengthens Your Claim Documentation
This is where things change. A public adjuster doesn’t just document damage they build a case designed to maximize your payout.
They bring:
- Detailed inspection methods
- Professional reporting tools
- Experience with insurer expectations
- Negotiation backed by evidence
Better documentation leads to stronger claims. Stronger claims lead to better outcomes. It’s not theory. It’s leverage.
Final Checklist: Hail Damage Documentation Quick Guide
Use this as your go-to reference:
- Take wide-angle property photos
- Capture detailed roof damage images
- Document all exterior items (HVAC, gutters, siding)
- Check interior for leaks or stains
- Record storm date and details
- Create a damage inventory list
- Save all receipts and repair records
- Organize everything clearly
Miss one step, and your claim weakens. Complete them all, and you’re in control.
Conclusion
Hail damage isn’t just about impact it’s about proof. The difference between a frustrating claim and a successful one often comes down to documentation. Clear, thorough, organized evidence gives you power. It gives you confidence. And most importantly, it gives you leverage when dealing with insurance companies. If you take one thing from this guide, let it be this: your hail damage insurance claim documentation is your strongest tool. Use it well.
FAQs
You should document hail damage as soon as it’s safe, ideally within 24–48 hours, to preserve accurate evidence and prevent disputes.
Yes, but it significantly weakens your case since insurance companies rely heavily on visual proof to validate claims.
Take wide-angle shots of your property and close-ups of damage, using multiple angles and scale references like a coin or ruler.
Not necessarily use a drone or ground-level photos if it’s unsafe, but ensure you still capture clear evidence of roof damage.
You can still file a claim, but you’ll need supporting evidence like weather reports and a professional inspection to strengthen it.
Yes, interior signs like water stains or leaks help prove the roof was compromised and support your overall claim.
Only perform temporary repairs to prevent further damage, as permanent fixes may reduce or complicate your claim.
It should clearly list each damaged area, the type of damage, and severity to provide a complete picture for the adjuster.
They look for consistent impact patterns, clear evidence of damage, and proof linking it to a specific storm event.
You should consider one if your claim is complex, underpaid, or disputed, as they can improve documentation and negotiate on your behalf.